Running Commonly Used Gears
IF you have not already reviewed the “Gears” Basics, please go back and work through the introduction to Gears before continuing. In the following documentation, step-by-step instructions to run commonly used gears are included. If you have any questions, please contact INC staff. To contribute, please use the INC github repository
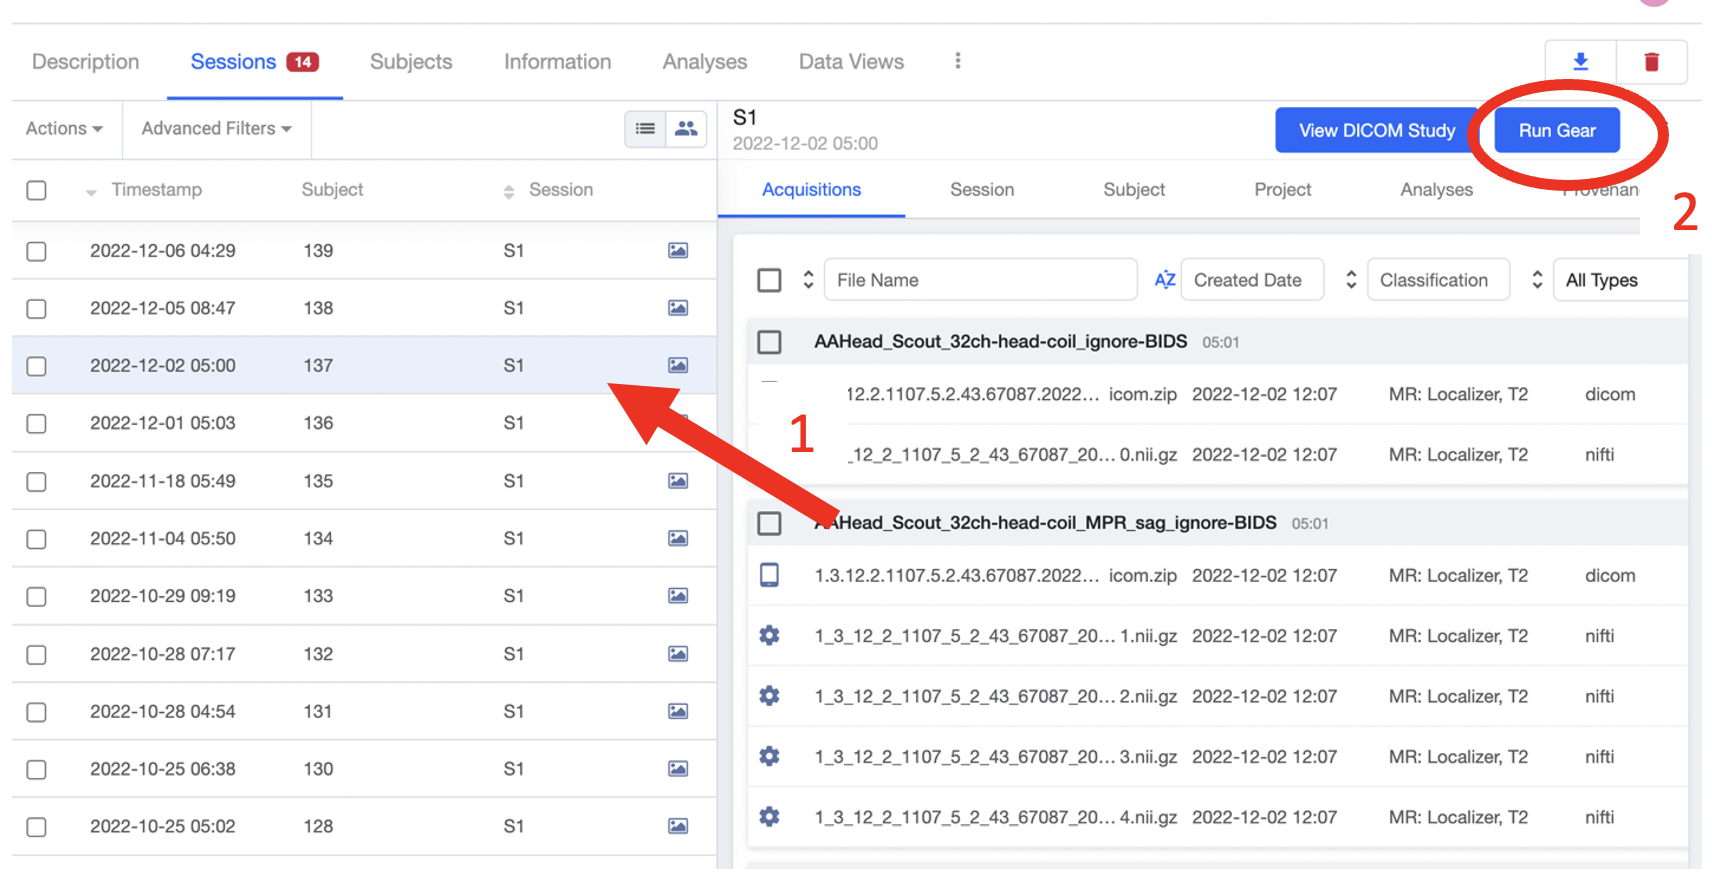
For all gears described below, begin by launching a session level analysis gear.
Select the session for the new analysis from the list of sessions on the left hand side. Once the correct session is selected, click “Run Gear” in the top right corner.
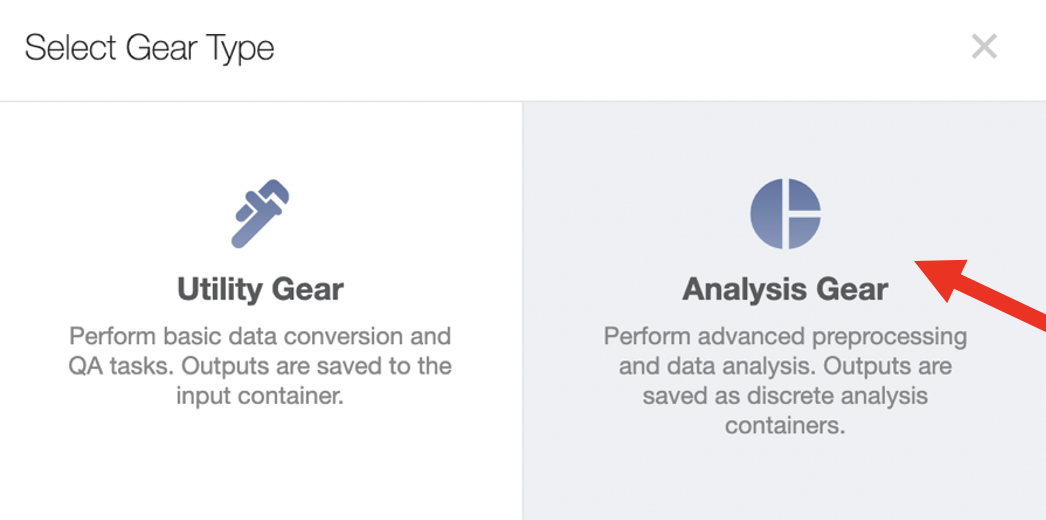
From the popup window, select “Analysis Gear”
MY BRAIN SOUVENIR
My Brain Souvenir is a custom Flywheel Gear used to generate electronic souvenirs for study participants. Image formats (GIF | JPEG | MOV) can be specified and output images can be configured to store defaced, brain extracted, or native images. Each study should check with the IRB coordinator to confirm appropriate sharable image formats and venues (e.g. email, secure link, etc).
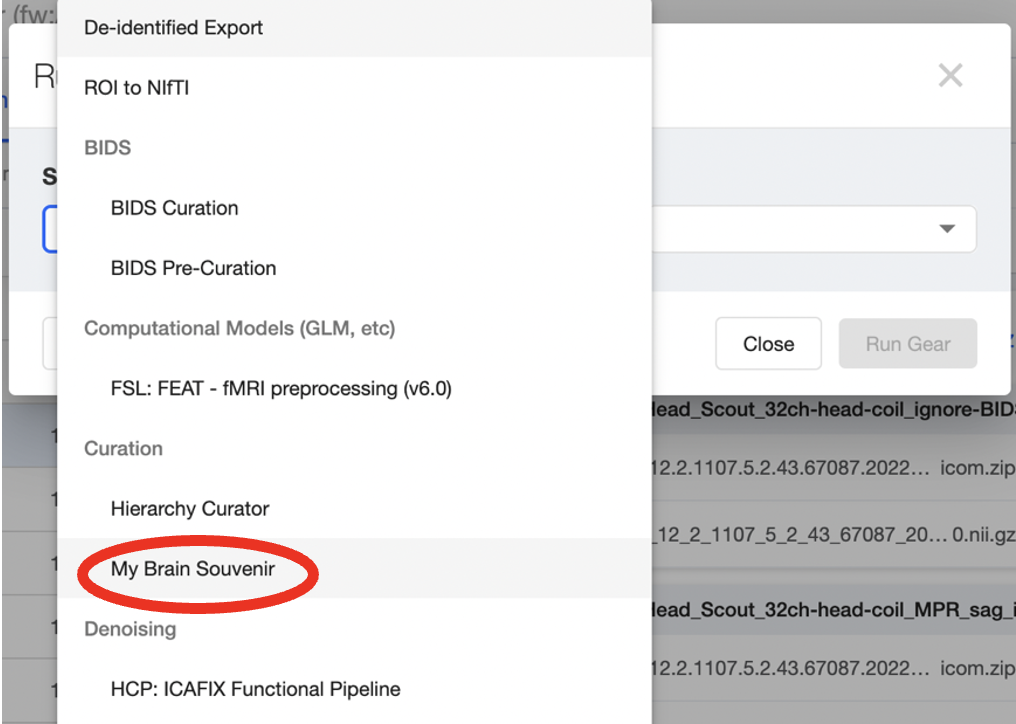
From the drop down list of available gears, select “Brain Souvenir”
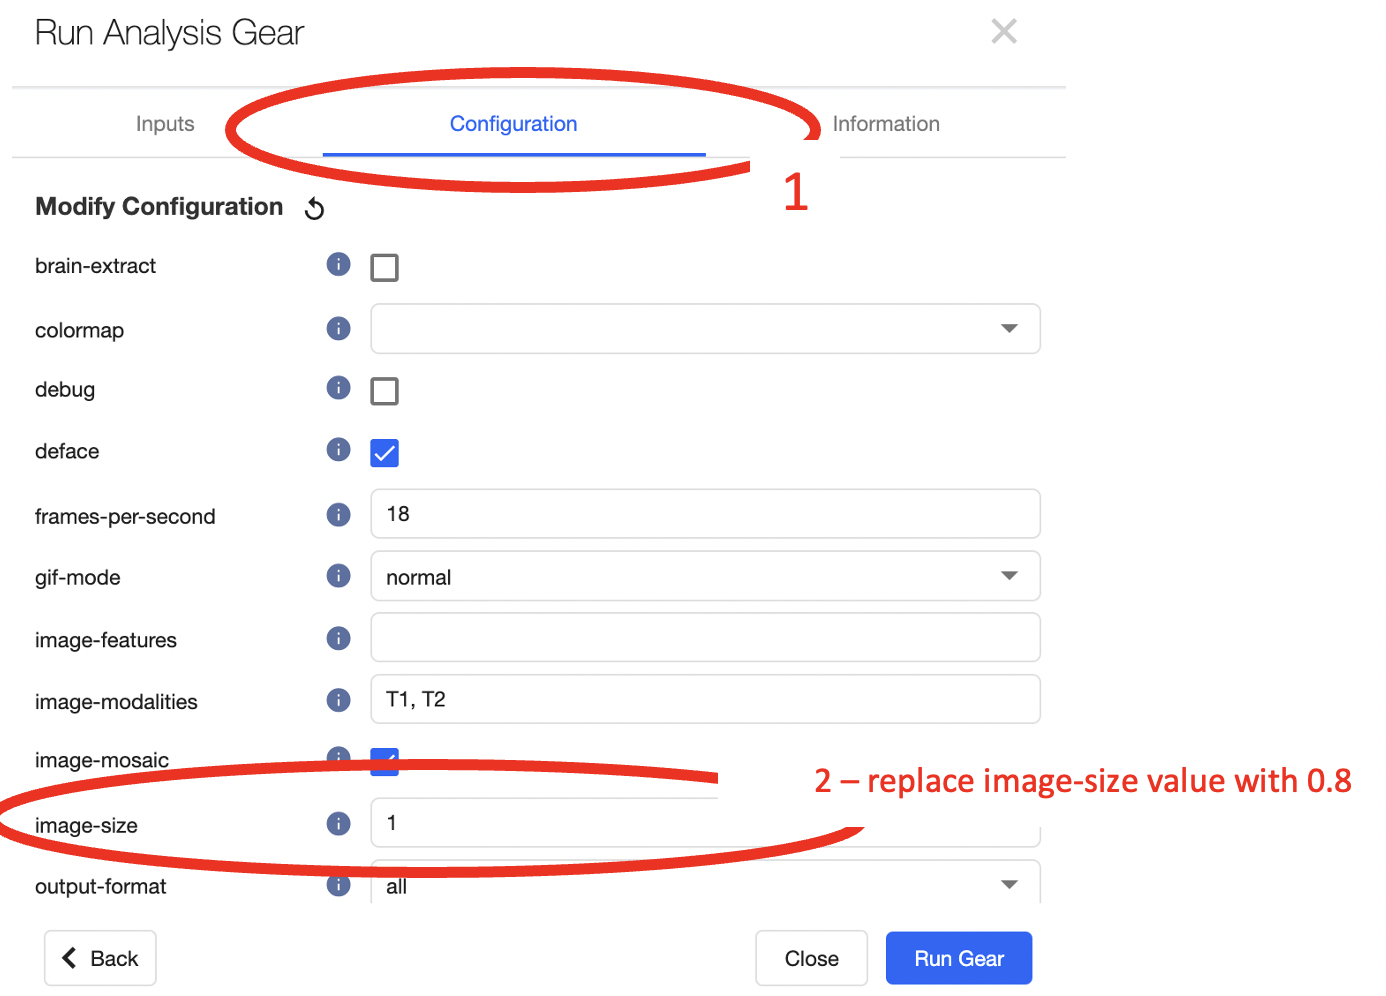
This gear requires no inputs, and the default configuration is pretty good. I recommend changing the image size config setting (image size = 0.8), to ensure the output images are small enough to be sent as email attachments. From the “Run Analysis Gear” Menu, select the Configuration panel.
Filename |
Contents |
|---|---|
<anat-acq>.gif |
Native Anatomical Scan (GIF Format) |
<anat-acq>.jpg |
Native, single midplane slice (JPEG Format) |
<anat-acq>.mov |
Native Anatomical Scan (MOV Format) |
<anat-acq>_defaced.gif |
Defaced Anatomical Scan (GIF Format) |
<anat-acq>_defaced.jpg |
Defaced, single midplane slice (JPEG Format) |
<anat-acq>_defaced.mov |
Defaced Anatomical Scan (MOV Format) |
BIDS CURATE
BIDS Curate gear should be run for all neuroimaging MRI sessions. Before running (or re-running) bids curate, all acquisitions should be in reproin standard naming format. If you are unsure if your data can be BIDS curated, contact INC staff.
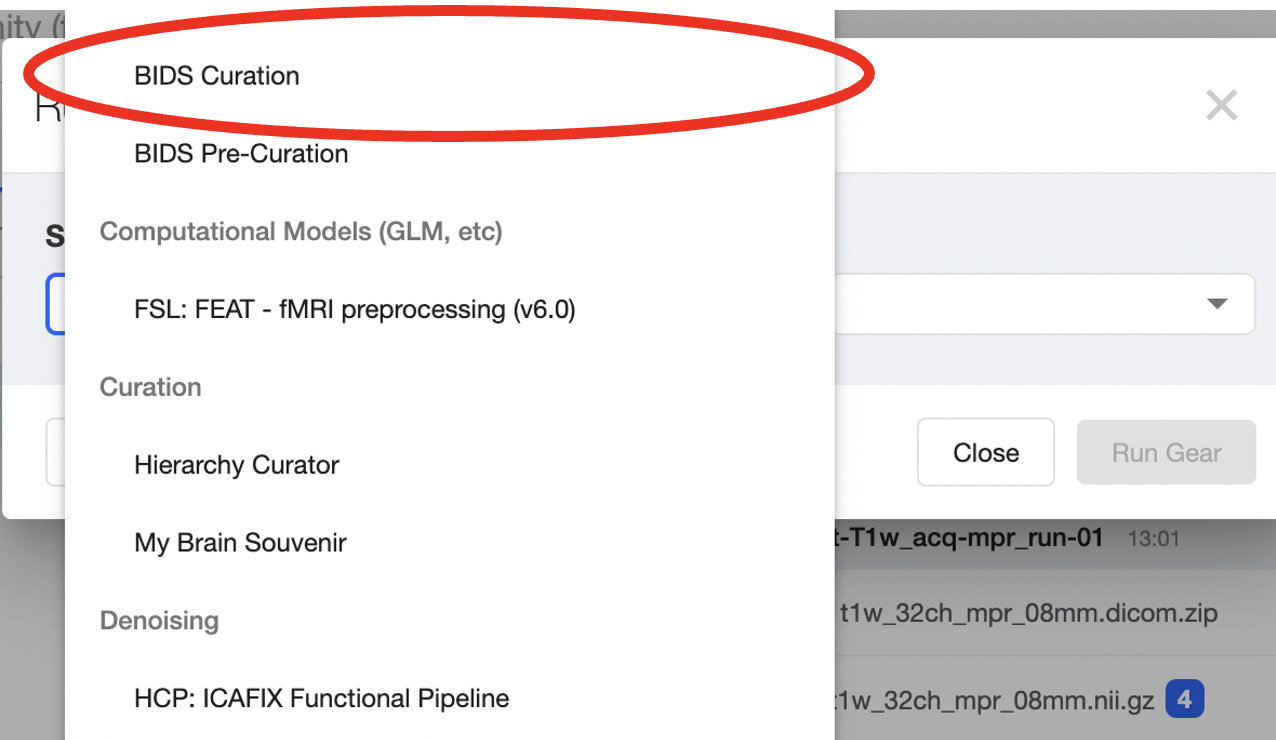
From the popup window, select “Analysis Gear” and scroll through the available gears to “BIDS Curation”
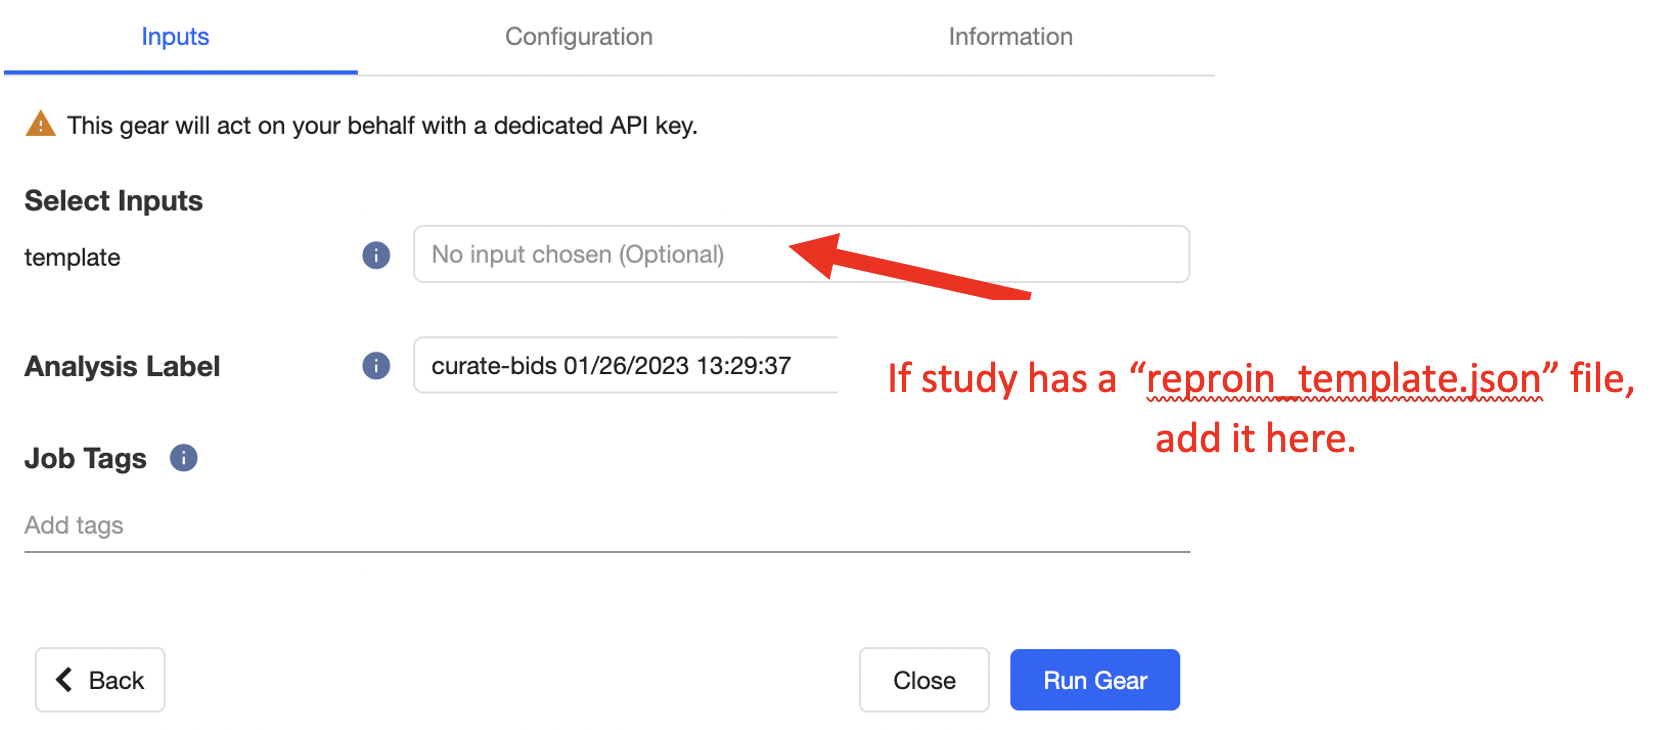
Add the appropriate inputs and configurations for the gear as shown below.
In the configuration tab, you may need to add following options:
(if re-running bids-curate) Reset :
True(if diffusion tensor in study) intendedfor_regex :
.*fmap.* nii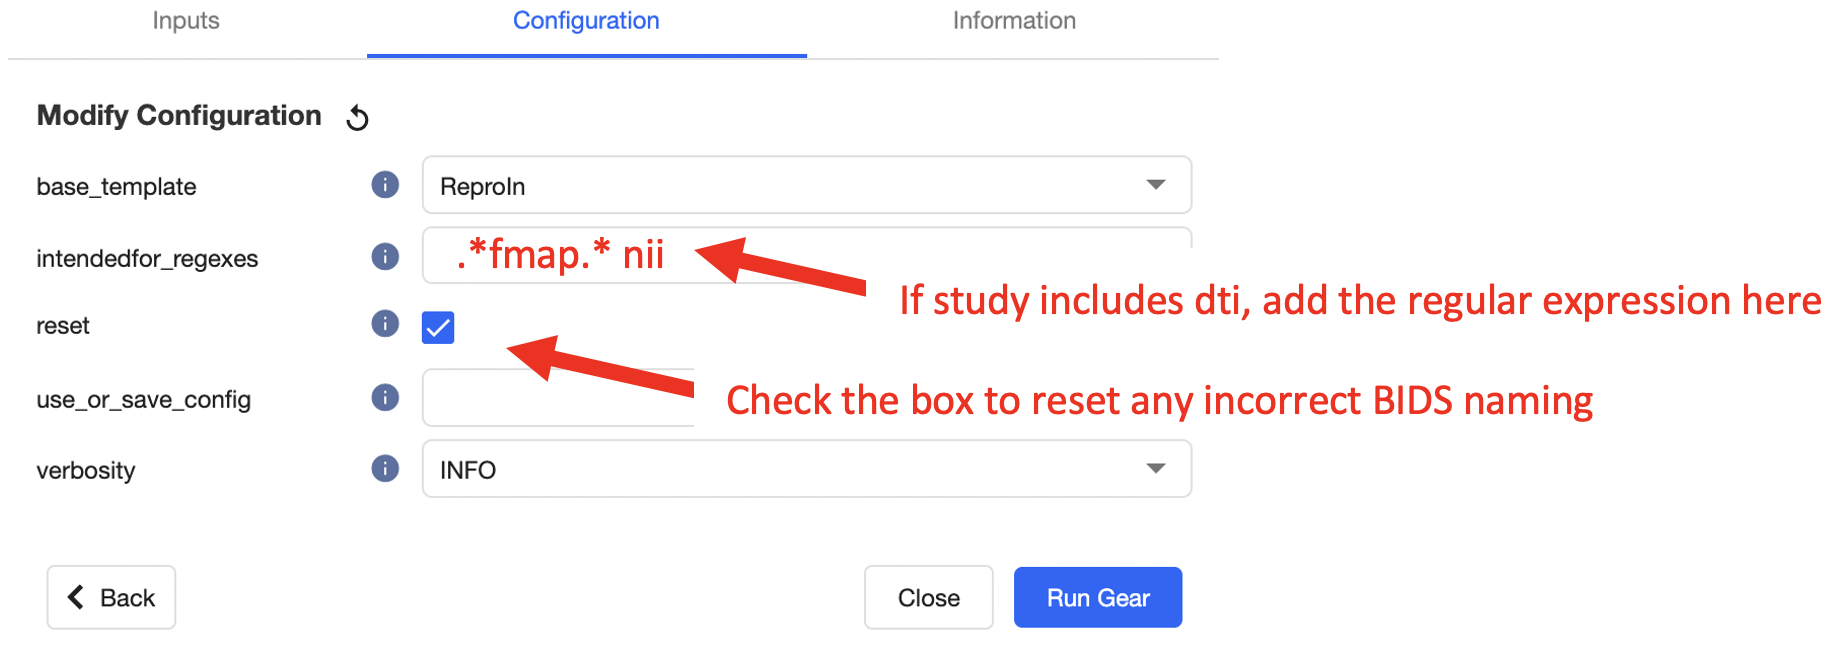
That’s it! Select the “Run Gear” button. Once the gear starts you should see the analysis in the list of session analyses. The icon next to the analysis will change from a spinning gear to a green check once it completes successfully. Check out the outputs of the gear to confirm BIDS naming convention was correctly applied.
EVENT CURATOR
The event curator is a derivative analysis using the hierarchy curator. A custom python script should be written to handle event creation from either an eprime or PsychoPy stimulus file. After uploading the recordings (see “Uploading Event Files”), this gear is used to generate derivative event data from the stimulus recordings. For help generating a python script for use with the hierarchy curator, contact INC staff.
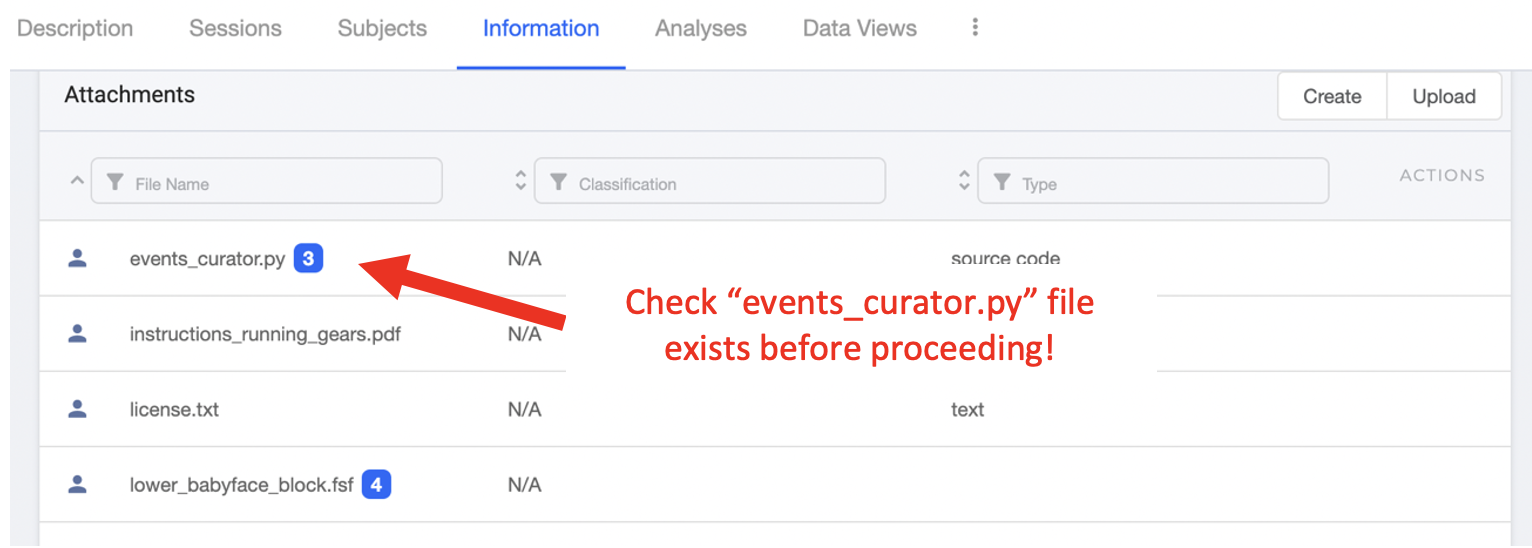
After uploading the raw timing files for all applicable acquisitions, you can generate event data using the “Hierarchy Curator” gear. You must have supporting curator code uploaded to your project. If you do not have an “events_curator.py” file in your project contact the INC Data and Analysis Team for assistance!
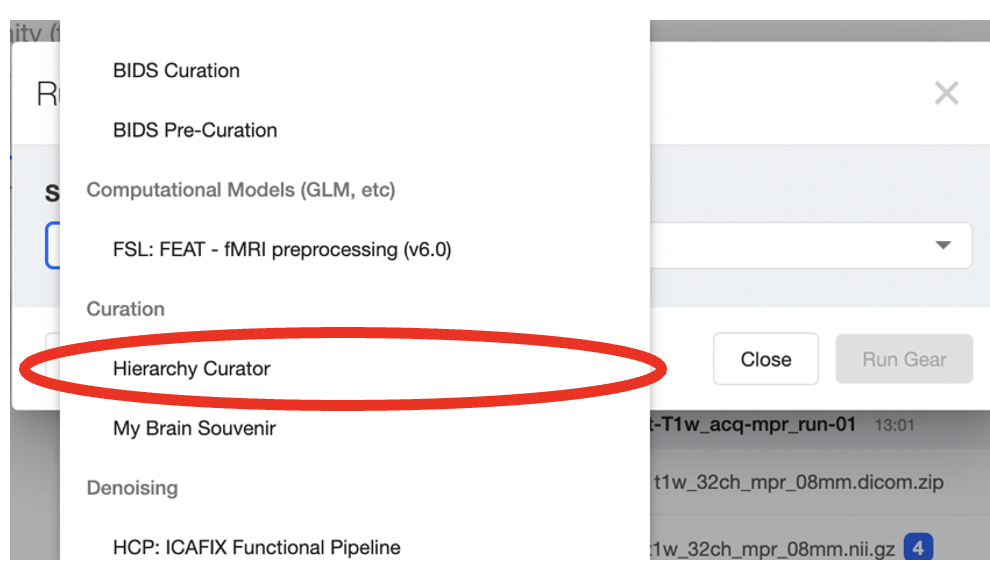
Return to the session of interest and select “Run Gear”. From the drop down menu, select “Hierarchy Curator”
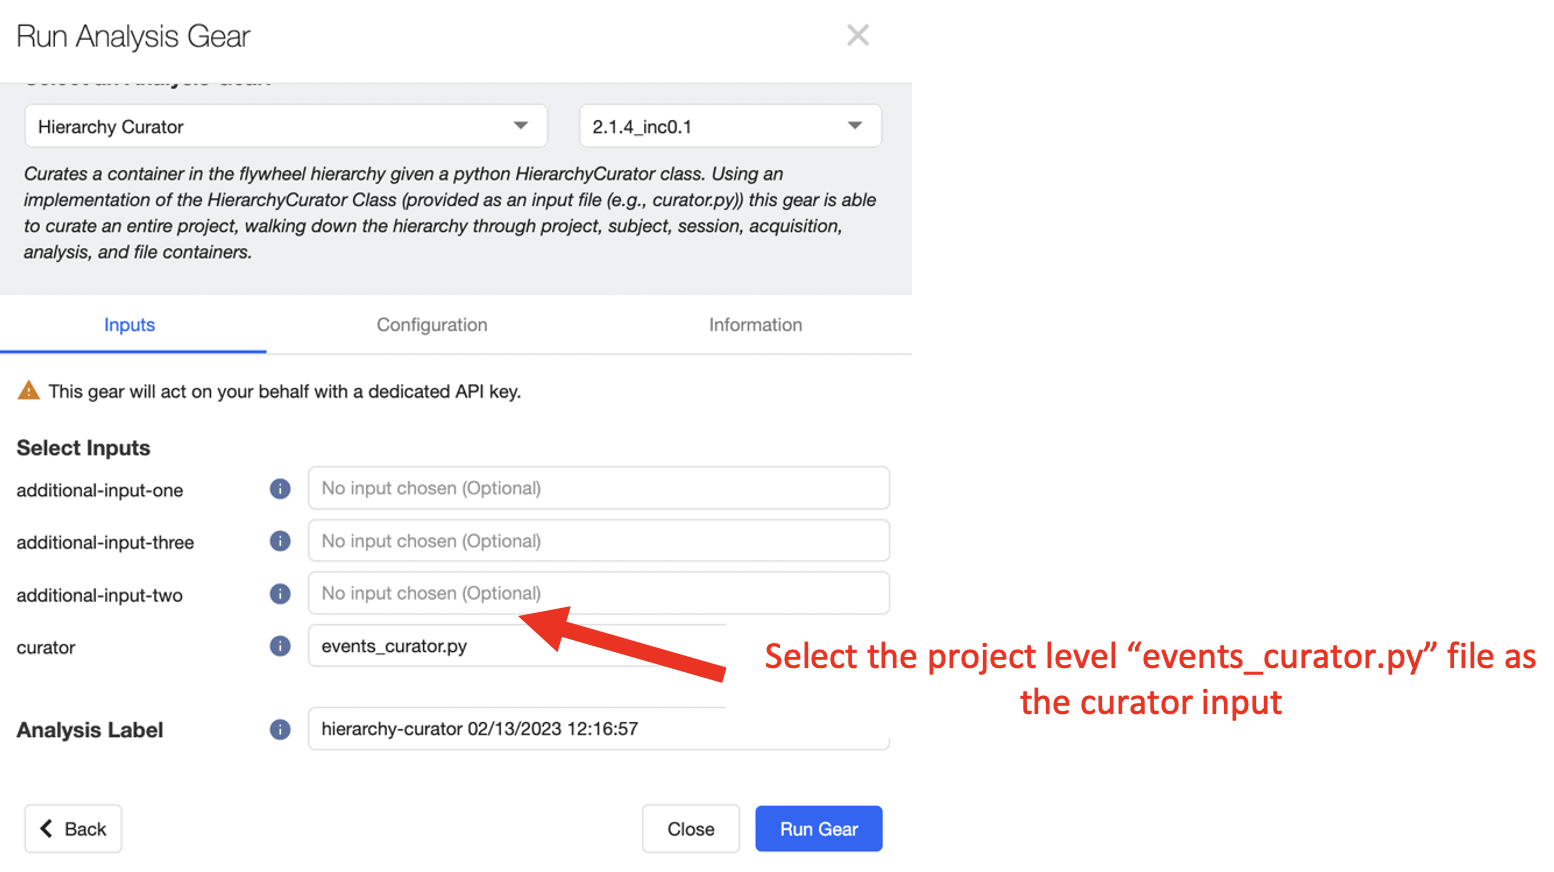
In the Gear “Inputs” select the “events_curator.py” file as the curator.
That’s it! After the gear finishes, check that new event files have appeared in the sessions acquisitions named “…events.tsv”
BIDS-MRIQC
bids-mriqc is a Flywheel wrapper for mriqc. MRIQC is used to extract image quality metrics (IQMs) from structural and functional magnetic resonance imaging data. Please cite the use of MRIQC as follows:
Esteban O, Birman D, Schaer M, Koyejo OO, Poldrack RA, Gorgolewski KJ; MRIQC: Advancing the Automatic Prediction of Image Quality in MRI from Unseen Sites; PLOS ONE 12(9):e0184661; doi:10.1371/journal.pone.0184661.
MRIQC is automatically run for all new sessions on INC Flywheel. If you need to change configuration settings, or re-run a failed job follow the instructions below.
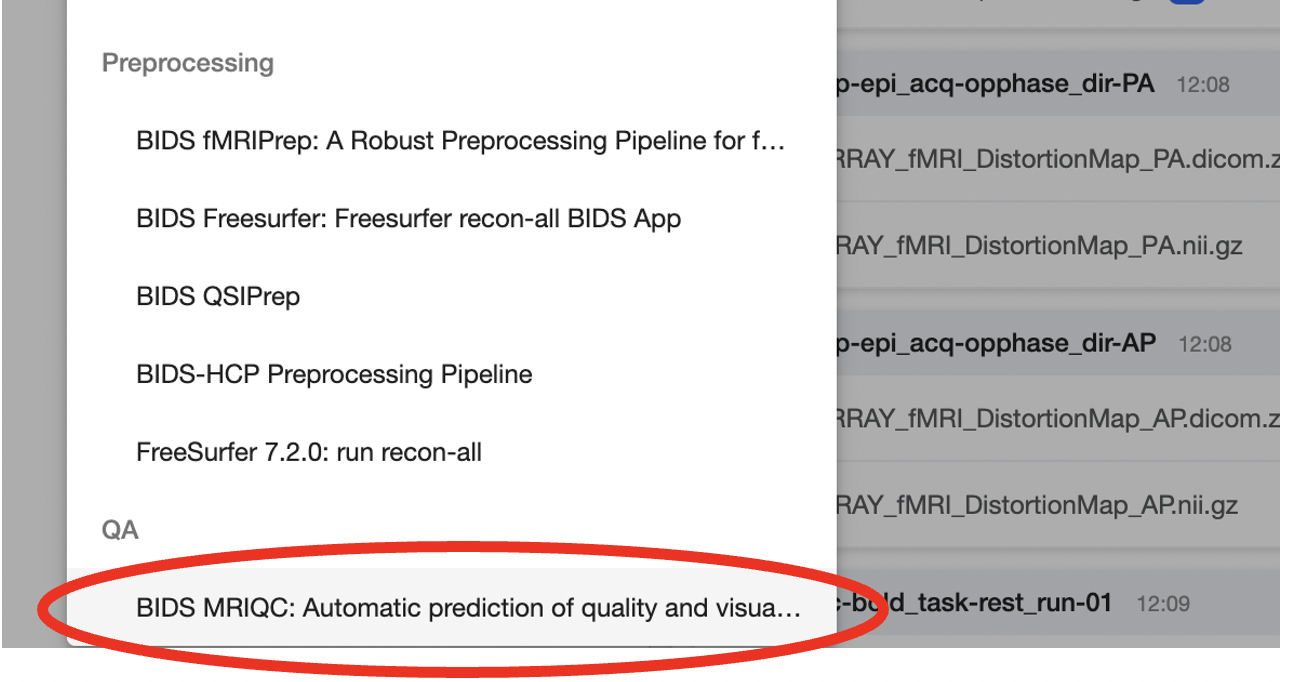
From the drop down list of available gears, select “BIDS MRIQC”
IMPORTANT!! This gear is HPC Compatible. Please always launch this gear on hpc to keep other compute resources free. To run the job on our HPC clusters, add a “Job Tag”: hpc
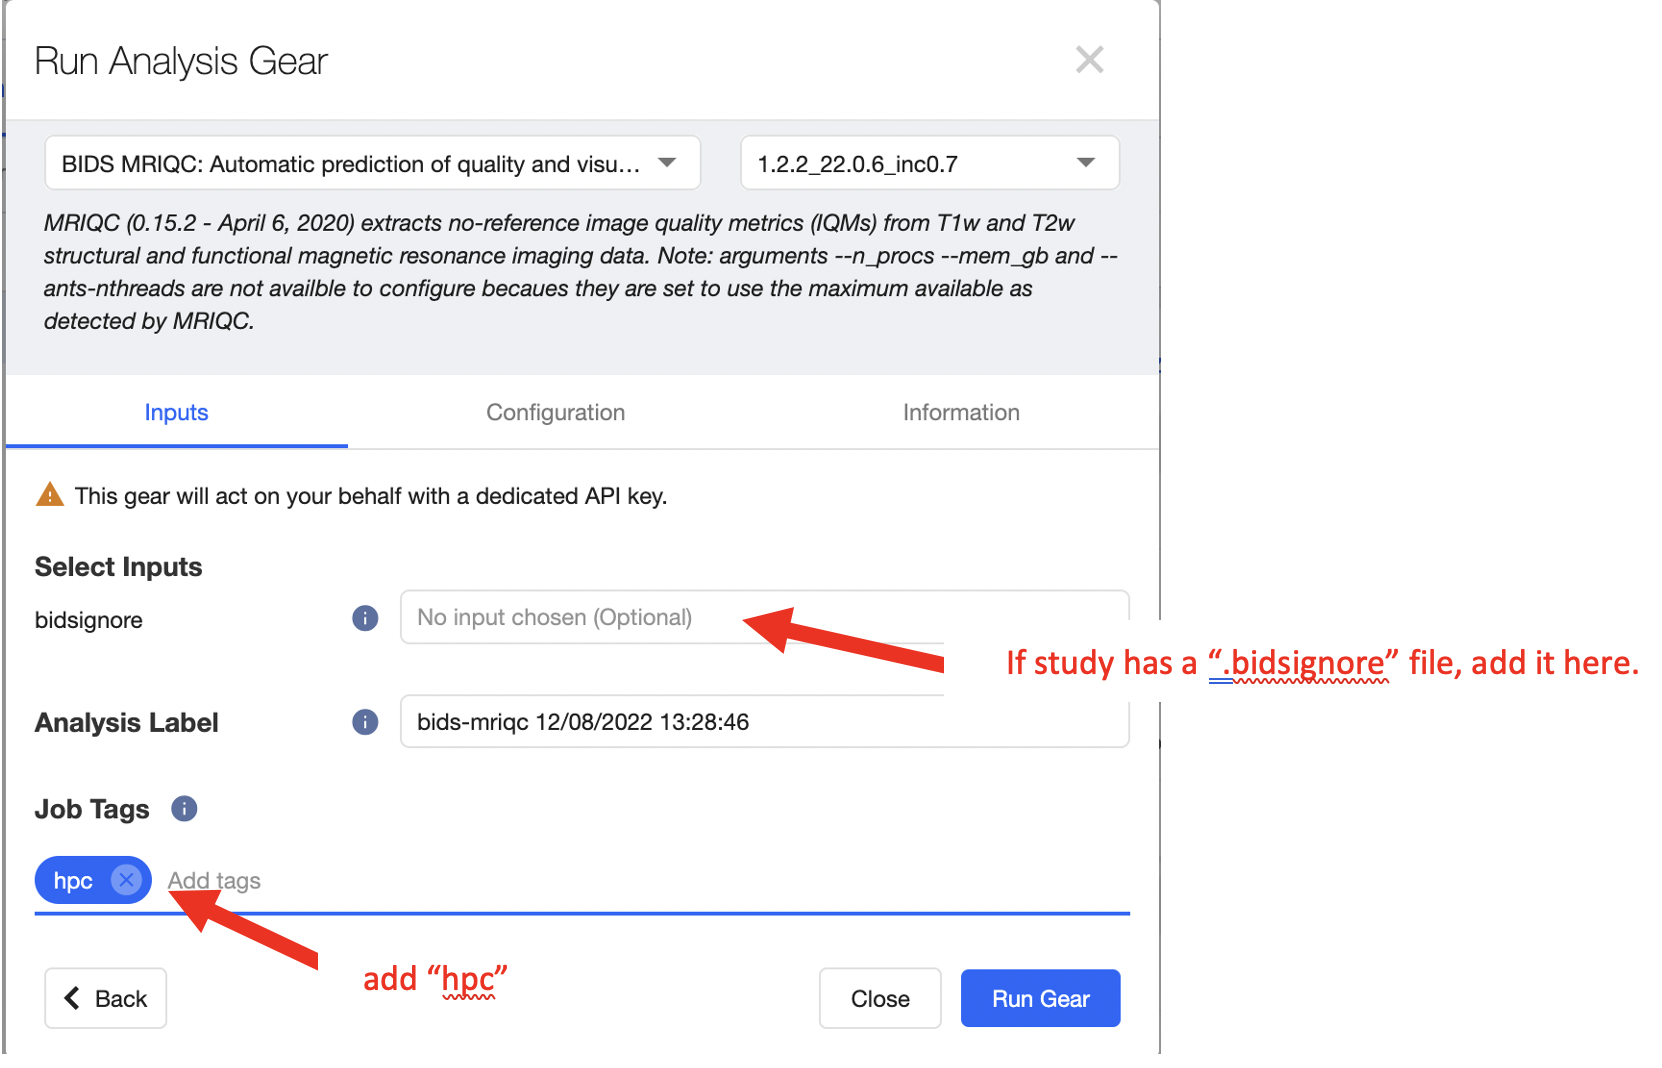
If your project has a .bidsignore file stored in the project information, add this file as the optional gear input.
Next, move to the Configuration panel. You will see configuration options for mriqc performance as well as CU Boulder’s HPC slurm scheduler. In general, these configuration settings can be set to default values. You can always find out more information about each configuration setting by hovering the mouse over the information circle next to each setting.
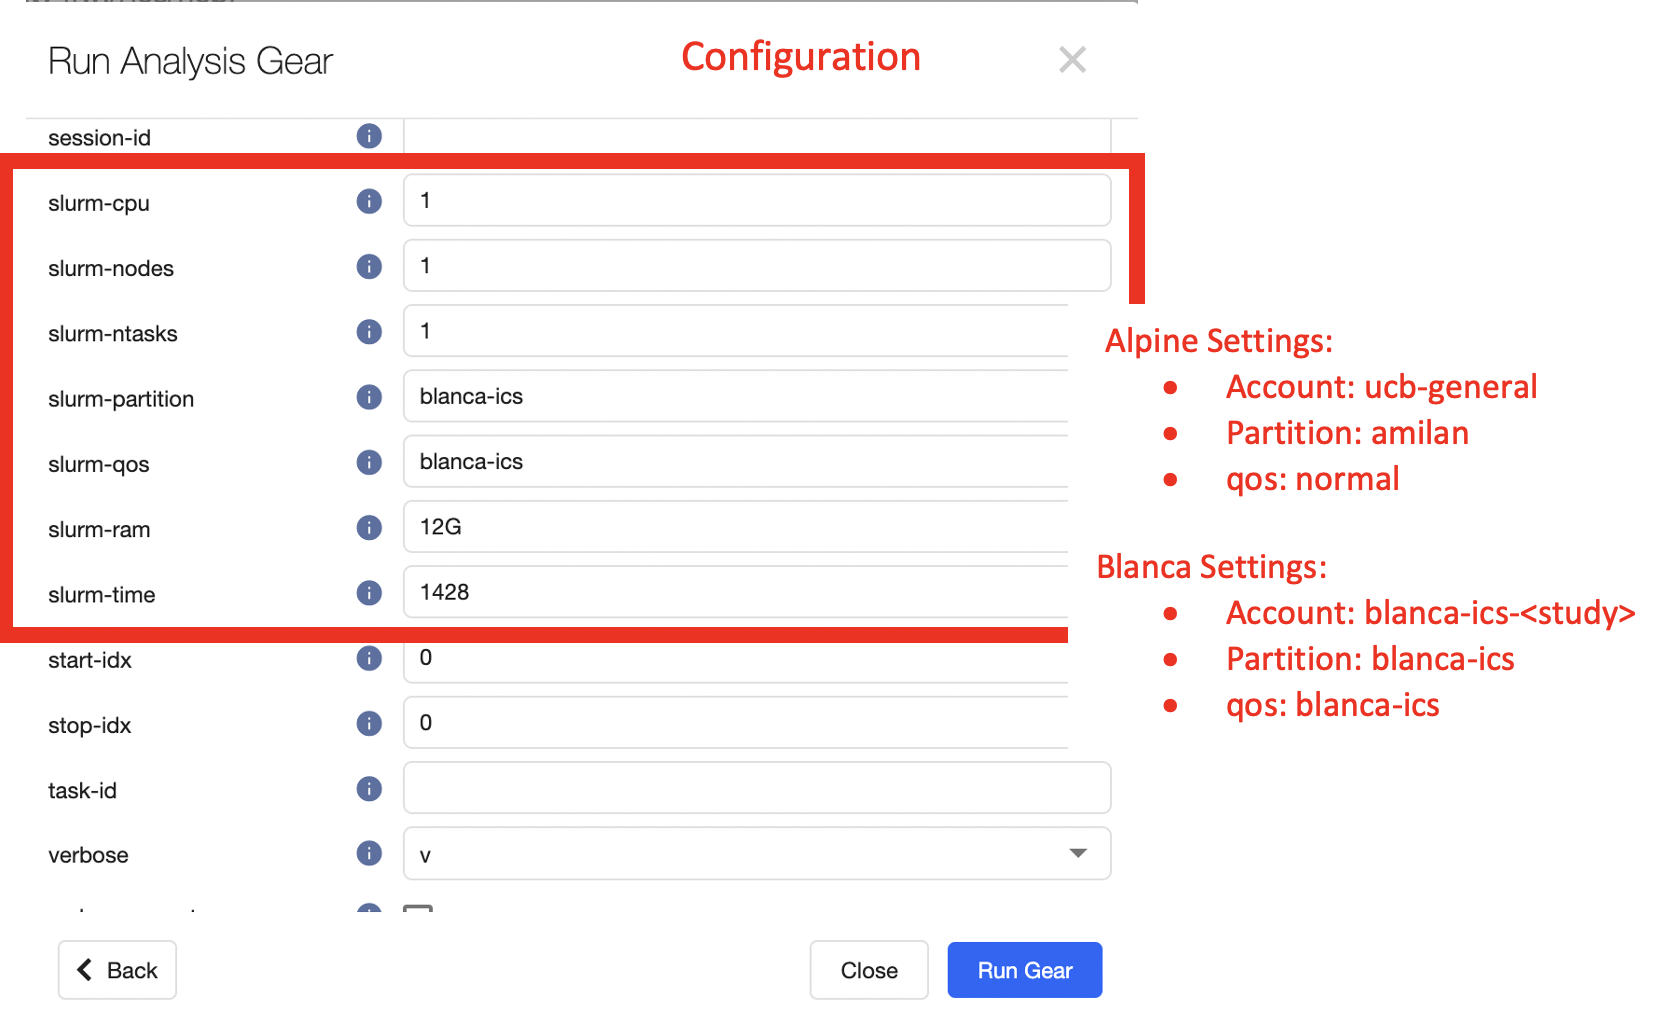
Set the HPC slurm scheduler settings as needed. By default the gear will run on blanca-ics with appropriate memory, RAM and wall time.
That’s it! Select the “Run Gear” button. Once the gear starts you should see the analysis in the list of session analyses. The icon next to the analysis will change from a spinning gear to a green check once it completes successfully.