The Basics
Don’t have a research computing account yet? Please request an account here.
What is Petalibrary?
PetaLibrary is a location where data is stored (similar to an external hard drive) and is regularly backed up to ensure data integrity. More accurately, PetaLibrary is a Research Computing managed storage cluster where scanner data and derivative data (i.e. analysis data) live for various projects. PetaLibrary is managed using allocations, which are predefined chunks of space allotted for storage to a given lab or group (eg: banich lab, kaiser lab, etc).
All of INC’s scanner data and Flywheel database data goes into an allocation titled ics. Many labs also choose to purchase storage on a PI-specific allocation (eg: the banich allocation). We advise you restrict the storage on CURC’s PetaLibrary to data you actively use on the high performance compute cluster. Archivable data should be moved to a different “cold storage” system, so you can retain these data at a lower cost.
It is therefore very important to not treat PetaLibrary like you may treat your personal laptop. We are on shared space: adding to one directory on the ICS allocation will decrease the total amount of free space available to everyone else.
What is Blanca?
Blanca is one of three high performance compute clusters managed by Research Computing (alpine and summit are the other HPC clusters) . Most of us are familiar with hard drives, but perhaps less familiar with a computer’s processor. While the hard drive is what stores large amounts of data, the central processing unit (or CPU) is what acts on the data (fetches it, decodes it, performs analysis, etc). You may think of a CPU as the thing in the computer that does all the thinking!
In simplified terms, a compute infrastructure is nothing more than a bunch of these CPUs and the networking structure that supports them.
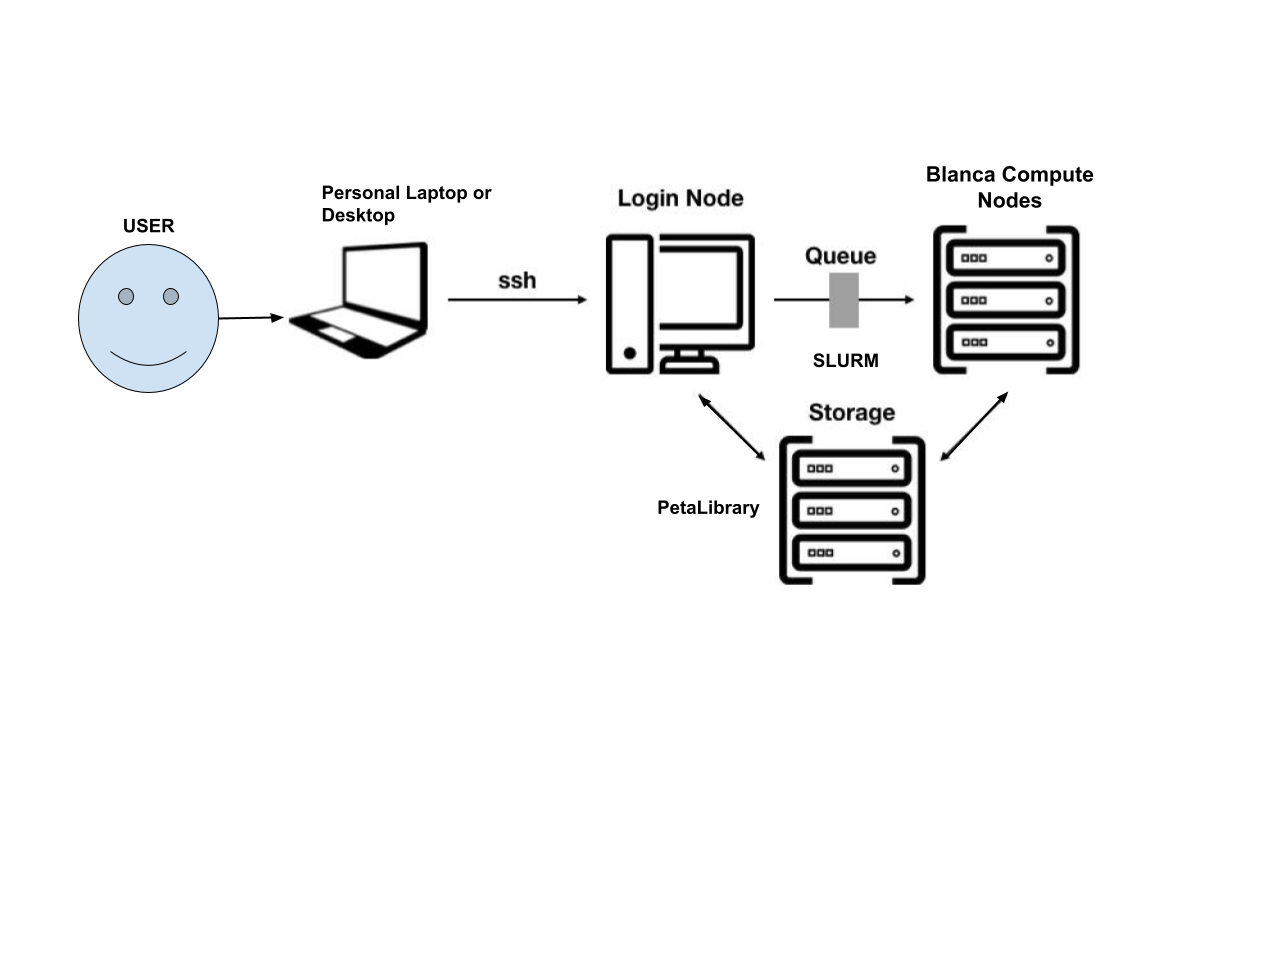
As INC, we have 12 nodes (essentially 12 dedicated “computers”) on which we can run analyses, collectively known as the blanca-ics cluster. Each node has between 28 and 56 CPUs. The reason we put “computers” in quotation marks is because these nodes don’t have hard drives, unlike computers. In the analogy above, think of these nodes as the processors, the thinkers, but they can’t actually store much information - storage is delegated to PetaLibrary.
INC also has 2 dedicated Blanca login nodes onto which PetaLibrary is mounted/accessible, and through which we can launch compute jobs onto our 12 compute nodes. The image below illustrates how a user interacts with our Blanca nodes.
High Performance Compute Portal
CU Boulder Research Computing (CURC) supports a browser based HPC Portal, Open OnDemand here. This browser based portal allows users to navigate and interact with CURC’s HPC from any anywhere with an internet connection! It’s a fast and easy one stop shop for your HPC needs.
Please visit CURC documentation on Open OnDemand for a step by step guide.
In the document below we will talk through the methods you need to access the HPC environment and get started with your own neuroimaging analyses. First, lets consider your “use case.” How will you be using HPC? Once you have that answer in mind, let us work through the following questions.
Do you need a Desktop?
In your use case will you need to interact with a graphical user interface (GUI)? Some examples where you may need a desktop include using CONN: Functional Connectivity Toolbox, viewing spreadsheets, or html reports, viewing data or images such as nifti images or surface meshes. Most other cases (such as moving/copying/deleting files, running bash or python code, etc.) can be achieved without a User Desktop.
- If you answer “Yes”
You will use Open OnDemand to start a new “Core Desktop” Interactive session. Follow the instructions in Using Core Desktop to get started.
- If you answer “No”
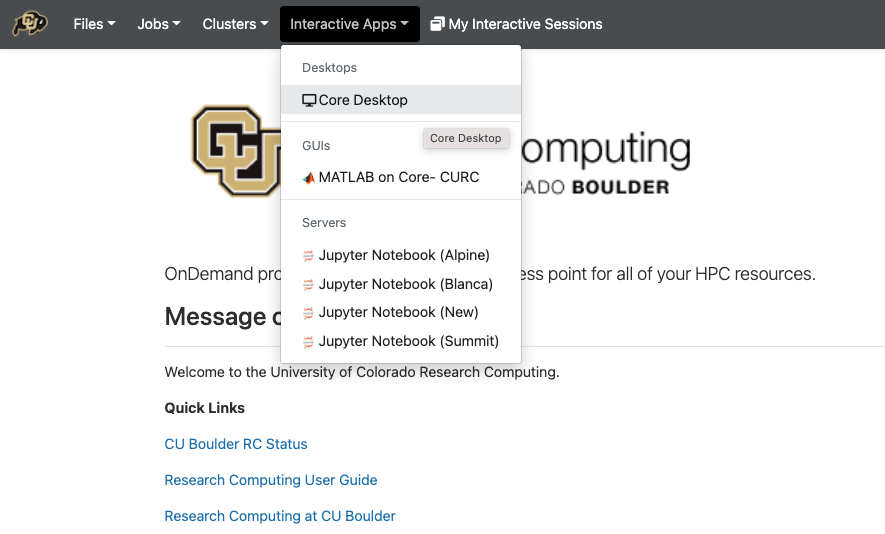
Without a desktop, we recommend you use an interactive “Jupyter Notebook” session. Follow the instructions in Using Jupyter Notebook to get started.
Using Core Desktop
Core Desktop is used to open a “Desktop” view into the HPC. The desktop is run on CURC’s viz nodes which are special GPU accelerated login nodes designed to support running desktop viewers for multiple users.
To get started, go to open ondemand.
From the dropdown list of “Interactive Sessions”, Select Core Desktop
Set the compute options for your Core Desktop session.

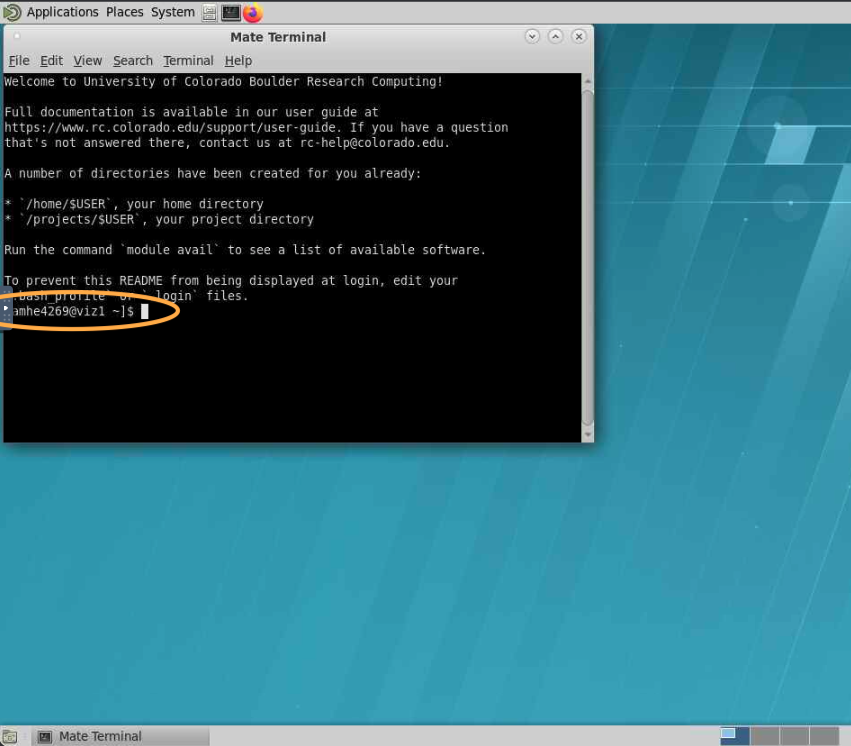
Launch the new Desktop. Here you can start a terminal, or another application.
Note
the Desktop is running on a viz node. To access filesystems and compute nodes exclusive to Blanca or alpine, will need to load the slurm module.
Alpine (and Blanca) Scratch Filesystem
Research Computing supports a large GPFS scratch filesystem. Scratch space should be used for all compute jobs run on Alpine or Blanca. These high-performance scratch directories are not backed up, and are not appropriate for long-term storage. Data may be purged at any time subject to overall system needs. Files are automatically removed 90 days after their initial creation. Once an analysis is complete, please move all data files to Flywheel or a Petalibrary Allocation for permanent storage.
- Scratch
/scratch/alpine/<identikey>/
Alpine scratch may also be viewed from the viz nodes on open ondemand.
Alpine (and Blanca) Compute
To run compute jobs on Alpine and Blanca compute nodes, we use a SLURM job scheduler. From viz nodes, simply load the correct slurm module to get started.
# to launch alpine compute jobs
module use /curc/sw/modules/slurm
module load slurm/alpine

# to launch blanca compute jobs
module use /curc/sw/modules/slurm
module load slurm/blanca
Some filesystems and software should only be used on compute nodes (the “workhorses” of HCP). You may start an interactive session in order to access these resources using Slurm’s interactive session.
# to start an interactive session (blanca)
sinteractive --partition=blanca-ics --qos=blanca-ics -c <number of cores> --mem <memory 1K/1M/1G> -t <time> --export=NONE

# to start an interactive session (alpine)
sinteractive --partition=amilan -c <number of cores> --mem <memory 1K/1M/1G> -t <time> --export=NONE
Looking for more information on using the Slurm scheduler, Blanca priority accounts, and more, contact INC staff
Using Jupyter Notebook
In most cases, actions you need to take on the HPC can be done using a terminal or within python using a Jupyter Notebook or Console. Want to learn more about Jupyter Notebooks? read up here.
To get started, go to open ondemand.
From the dropdown list of “Interactive Sessions”, Select JupyterHub 2 (Custom)
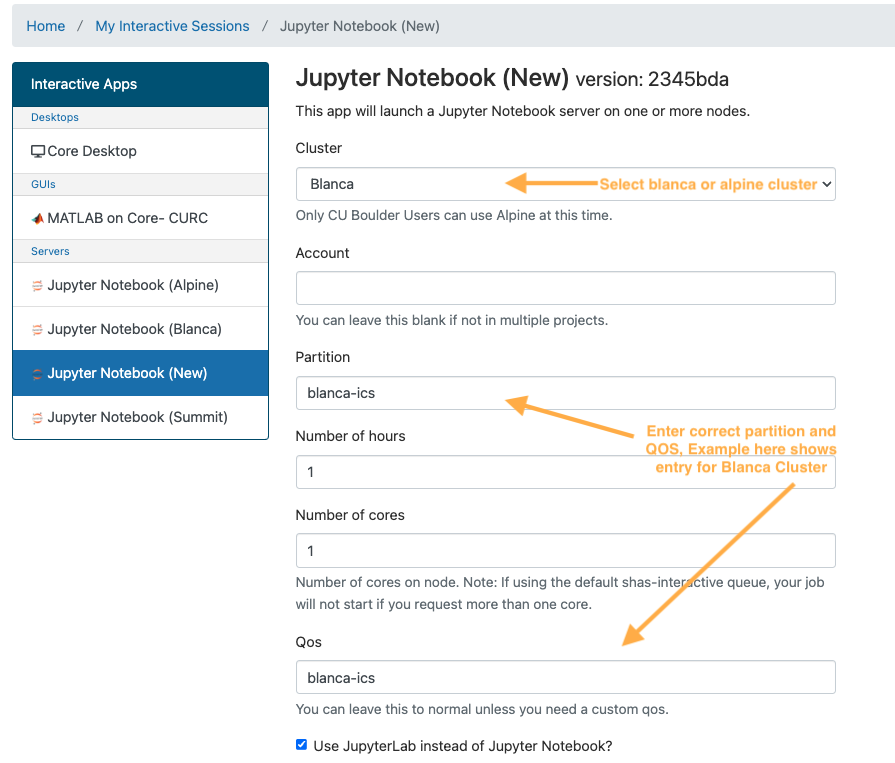
Set the compute options for your Jupyter Notebook session. Be careful to correctly set both the partition and QOS section, to match the desired cluster. Here are examples of correct partition/QOS settings:
- Blanca Cluster
- Partition:
blanca-icsQOS:blanca-ics - Alpine Cluster
- Partition:
amilanQOS: <leave blank>
Note
The new jupyter notebook session will be launched from a Blanca or Alpine compute node depending on your preference.
You can use the Terminal feature to run any shell scripts, as well as the Python Console and Python Jupyter Notebook for any python based scripts.
Setting Up Conda Environments
Our data and analysis team at INC have generated several custom python environments to support the needs of our researchers. Anaconda makes it easy to build and interchange virtual environments for running your python code. If you are new to anaconda, please check out research computing documentation on the subject.
To get started using the INC anaconda environments, please do the following:
On research computing’s HPC (summit, blanca, or alpine), create a text file
/home/$USER/.condarcwith the contents:
pkgs_dirs:
  - /projects/ics/.conda_pkgs_writeable
  - /projects/$USER/.conda_pkgs
envs_dirs:
  - /projects/ics/software/anaconda/envs
  - /projects/$USER/software/anaconda/envs
Next, load the anaconda software using
modulethen confirm you “see” all the shared conda environments:
[amhe4269@bnode0301 ~]$ module load anaconda
(base) [amhe4269@bnode0301 ~]$ conda env list
# conda environments:
#
base                  *  /curc/sw/anaconda3/2020.11
atocblm_22               /curc/sw/anaconda3/2020.11/envs/atocblm_22
globus                   /curc/sw/anaconda3/2020.11/envs/globus
synoptic_f22             /curc/sw/anaconda3/2020.11/envs/synoptic_f22
datalad                  /projects/ics/software/anaconda/envs/datalad
flywheel                 /projects/ics/software/anaconda/envs/flywheel
incenv                   /projects/ics/software/anaconda/envs/incenv
Note
The output of conda env list may look slightly different from what is shown above, but you should see paths that point to /projects/ics/software/anaconda/envs/
Finally, you need to create a kernel to be able to access any of these environments in jupyterhub:
[amhe4269@bnode0301 ~]$ module load anaconda
(base) [amhe4269@bnode0301 ~]$ conda activate flywheel
(flywheel) [amhe4269@bnode0301 ~]$ python -m ipykernel install --user --name flywheel --display-name flywheel
Note
You need to create a python kernel for every conda environment you want to be accessible through jupyterhub. This has to be run for each new user.
That’s it! You are ready to start developing!
Keep Reading to learn more about leveraging the large Scratch filesystem with Flywheel for local analyses. Go to Get to Know Your Scratch Space